


If you’ve ever wanted to learn to create art and games with programming, you might have heard of Processing. Processing is a kind of coding sketchbook, used by programmers and artists alike. By using basic programming concepts, you can create beautiful visuals, games, and animations. It also can be used with different languages — you can use their own Java-based language, Python, or Javascript. You can even use it to create Android apps or Raspberry Pi projects.
It’s easy to jump straight in, even with very little coding experience. Today I’ll show you how to create color-shifting brush strokes. This will teach you the basics of drawing to the canvas, manipulating shapes, and adding color.

Getting Started
To start, you first need to download Processing. For this tutorial, I’m using the basic editor which is based on the Java language. Once you have it installed, go ahead and open it up.
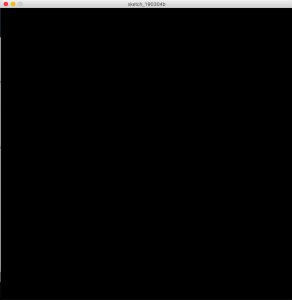
We’re starting with a blank editor, but we’ll fill it in soon enough! To start, we need to get our canvas setup. Processing gives you a function for this, which is conveniently named setup. This will run once when our program starts and is used to create everything we initially need for our visual, such as our canvas size and background color. Let’s create a basic black canvas.
void setup () {
size(800, 800);
background(0);
}
What we’re doing here is setting the size of the canvas to 800px wide and 800px tall and giving it a black background color. If you click the play button in the top left corner, you should end up with something like this:
So now you have a basic Processing sketch! Let’s make it a little more interesting now.
Creating Shapes
We’ll start by drawing a red circle to the canvas. We need to create a draw function — this will loop forever until we stop the sketch, and it runs automatically when you run the sketch so there’s no need to call it. Drawing a red circle to the canvas only takes a few lines of code:
void draw () {
fill(255, 0, 0);
ellipse(50, 50, 50, 50);
}
We’re setting the color of the circle using fill which takes RGB values. So we have red set to 255, while blue and green are set to 0. We then draw the circle itself using ellipse and giving it the x position, y position, height, and width. In this case, it’ll be 50px to the right, 50px down, 50px tall, and 50px wide. When we run the sketch now, we get this:

You can play with the values of fill and ellipse to the change the color, size, and position of the circle. To make our brush strokes, we’re going to have fun with all three of these!
Moving and Expanding the Circle
We’re going to let the user now interact with our sketch by letting them use the mouse to control the size and position of the mouse.
First, at the start of our file, we need to add an integer named circleSize and set its initial value to 0. Next, we need to update our draw function to do the following:
- Detect when the mouse is pressed
- Draw a circle at the x and y position of the mouse
- While the mouse is pressed, increase circleSize
- When the mouse is released, reset circleSize to 0
Luckily, Processing gives us a lot of tools to do this. Here’s the code to do this:
int circleSize = 0;

void setup () {
size(800, 800);
background(0);
}

void draw () {
if (mousePressed) {
fill(255, 0, 0);
ellipse(mouseX, mouseY, circleSize, circleSize);
circleSize++;
} else {
circleSize = 0;

}
}
In draw, we check if the mouse is pressed, then draw the circle at the x and y coordinate of the mouse. We continually increase the size of the circle while the mouse is pressed — remember, draw keeps looping so circleSize++ will keep increasing that variable. Finally, if the mouse is not pressed, we reset circleSize to 0.
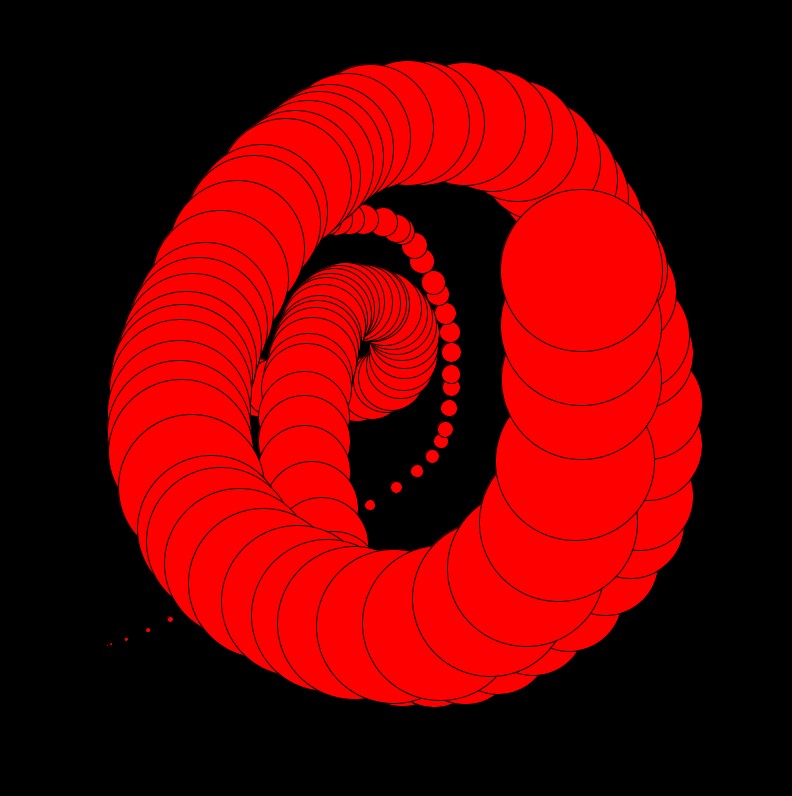
Now run the program and hold down the mouse, and drag on the canvas. You should be able to do something like this:
Color Shifting
Next, let’s try adding a little more color. There’s a lot of ways to do this (and I encourage you to play around with it!), but let’s make it so each time we click the mouse it’ll add either more red, green, or blue.
Start by adding three new integer values to the top of our file — one for red, green, and blue. Set them all to 0. We’ll also create an integer value called colorMode and set it to 1. We’ll use this to determine which of our three colors we want to add on a mouse click.
Now, we’ll edit our draw function to check our colorMode and determine which color value to increase.
void draw () {
if (mousePressed) {
fill(red, green, blue);
ellipse(mouseX, mouseY, circleSize, circleSize);
circleSize++;

if (colorMode == 1) {
red++;
}

if (colorMode == 2) {
green++;
}

if (colorMode == 3) {
blue++;
}
} else {
circleSize = 0;
}
}
As you can see, we’ll increase either the red, green, or blue values depending on how this is set. But we also need to reset it when the user releases the mouse. Luckily, processing makes this simple. We need to add a function called mouseReleased and add our logic there.
void mouseReleased() {
colorMode++;
if (colorMode > 3) {

colorMode = 1;
}
}
Now, whenever the mouse is released it’ll switch to the next color. If we go above 3, it’ll reset it back to one. So our order will be red, green, blue, repeat.
Try running the program and playing around with it. You should be able to see the circle expanding and changing color with each new click.
There is one problem though — what happens when all of the values reach 255? Well, with our logic now, they’ll just keep increasing. Which means, eventually we’ll just get a while circle and no more color. There’s a number of options to fix this issue. You could just reset the color back to 0 once it hits 255, but it’s a bit jarring of a change. I wanted something a little smoother, so I opted to make the color values decrease once they hit 255, and increase again when they hit zero. So we’ll oscillate between extremes.
To set this up, we need to set up three new integers again at the top of the value. I named mine redValue, greenValue, and blueValue and set them all to 1. We know that if our color value is equal to 255, we want to decrease it gradually back to 0. Once it hits 0, we want to increase it back up to 255. Let’s add this logic for our red color.
if (colorMode == 1) {
if (red == 255) {
redValue = -1;
} else if (red == 0) {
redValue = 1;
}
red += redValue;
}
Now, run the program and hold down the mouse button. The red should increase to its highest value, then start to decrease. It’ll look like it’s getting brighter and then darker.
Let’s add this to our blue and green now. We’ll end up with a draw function that looks like this:
void draw () {
if (mousePressed) {
fill(red, green, blue);
ellipse(mouseX, mouseY, circleSize, circleSize);
circleSize++;

if (colorMode == 1) {
if (red == 255) {
redValue = -1;
} else if (red == 0) {
redValue = 1;
}
red += redValue;
}

if (colorMode == 2) {
if (green == 255) {
greenValue = -1;
} else if (green == 0) {
greenValue = 1;
}
green += greenValue;
}

if (colorMode == 3) {
if (blue == 255) {
blueValue = -1;
} else if (blue == 0) {
blueValue = 1;
}
blue += blueValue;
}
} else {
circleSize = 0;
}
}
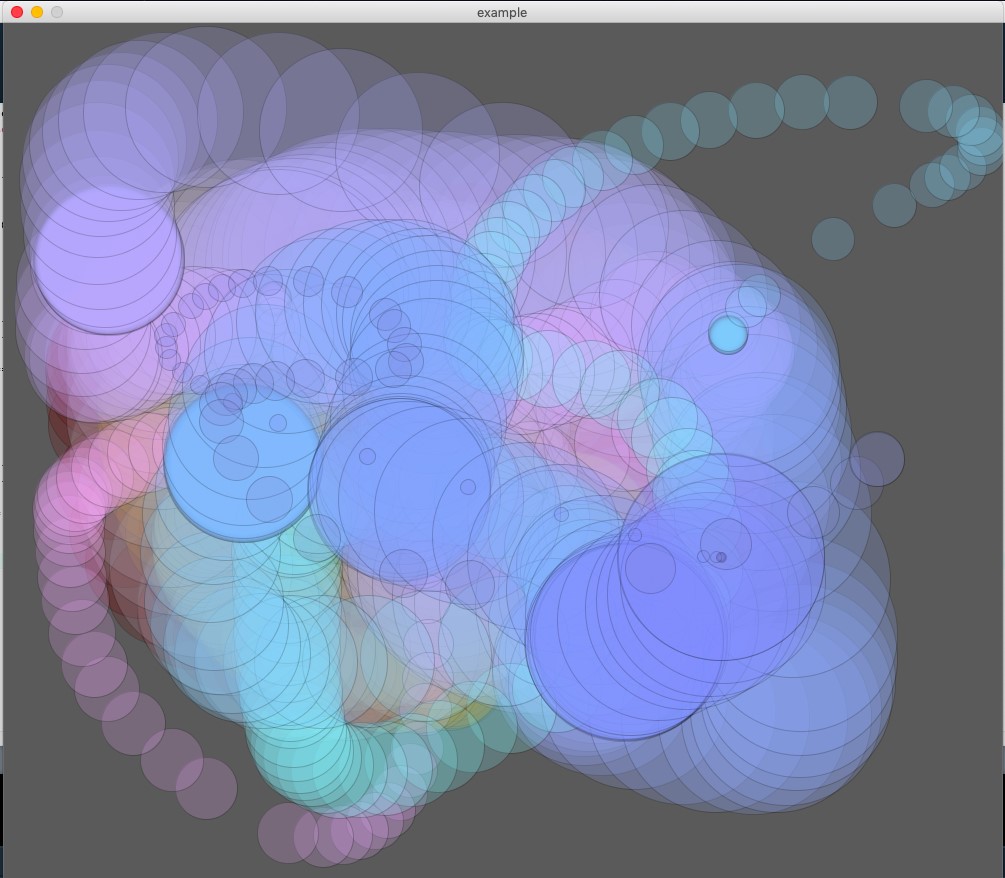
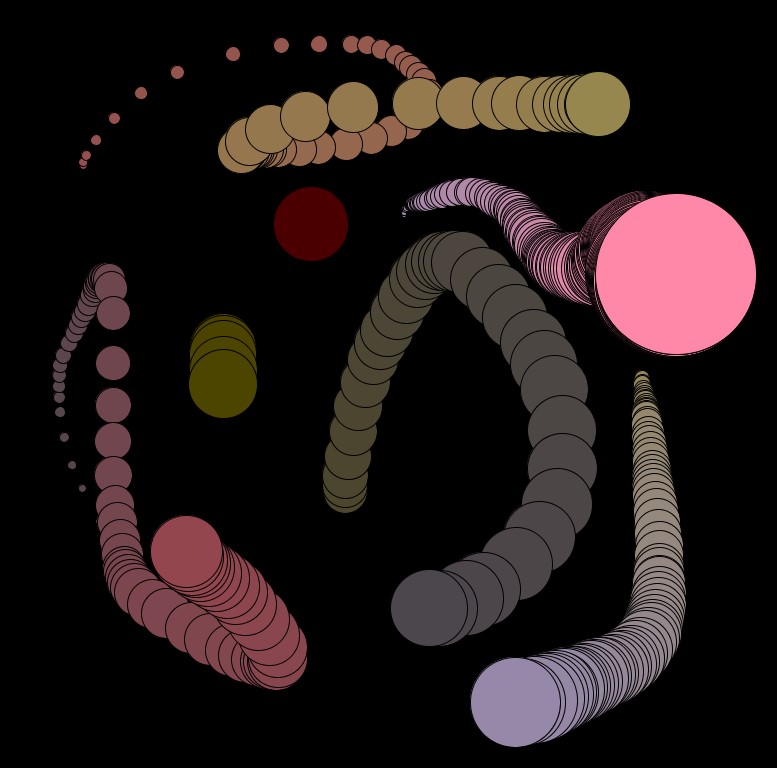
Now, let’s play around with it. Run the program and click and drag a few different times. Watch how the colors shift as we hold the mouse down:
And that’s it! You have a basic brush to play around with and an overview of how Processing works.
Additional Changes
I ended up wanting to make more changes to mine. I decided to play around with the opacity of the colors and the stroke. I did that by adding an extra value to my fill method and adding a stroke method on the line above it.
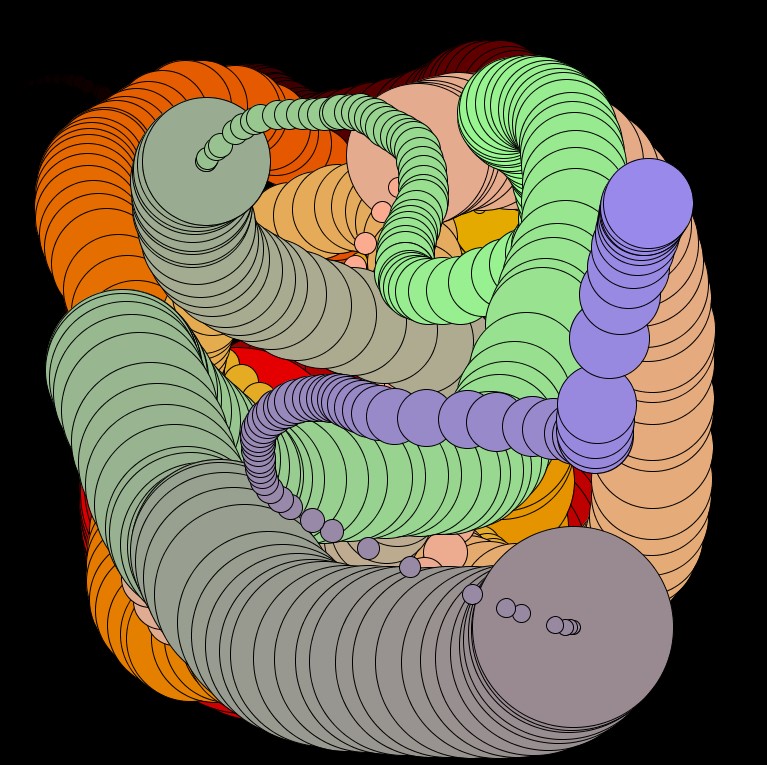
stroke(0, 0, 0, 50);
fill(red, green, blue, 50);
The stroke is just the outline around the shape — so you can set it to whatever color and opacity you want. I made mine black, with an alpha value of 50. You can set the alpha to anywhere between 0 and 255, where 0 is 0% opaque and 255 is 100% opaque. I also added this alpha value to my fill color, so my circles are more transparent. By doing that, I get an effect like this:

And that’s it! Take some time to play around with different values and shapes, and dig into the Processing documentation to get some inspiration and ideas. If you prefer using Javascript or Python, checkout P5JS and Processing.py to get started with those. Processing is a very powerful tool and you can make things as simple or complicated as you want, so be sure to have some fun with it!
Here’s the full code:
int circleSize = 0;
int red = 0;
int green = 0;
int blue = 0;
int redValue = 1;
int greenValue = 1;
int blueValue = 1;
int colorMode = 1;

void setup () {
size(800, 800);
background(0);
}

void draw () {
if (mousePressed) {
stroke(0, 0, 0, 50);
fill(red, green, blue, 50);
ellipse(mouseX, mouseY, circleSize, circleSize);
circleSize++;

if (colorMode == 1) {
if (red == 255) {
redValue = -1;
} else if (red == 0) {
redValue = 1;
}
red += redValue;
}

if (colorMode == 2) {
if (green == 255) {
greenValue = -1;
} else if (green == 0) {
greenValue = 1;
}
green += greenValue;
}

if (colorMode == 3) {
if (blue == 255) {
blueValue = -1;
} else if (blue == 0) {
blueValue = 1;
}
blue += blueValue;
}
} else {
circleSize = 0;
}
}

void mouseReleased() {
colorMode++;

if (colorMode > 3) {
colorMode = 1;
}
}